Tuesday, September 27, 2011

Bits & Pieces

Sorry for the lack of new stuff. New job! Busy busy! Doing a big jamming session soon, preparing to make some cool recipes including homemade ravioli and risotto...yum yum.

Happy pictures for a happy week (a week in Chantel land is apparently Tuesday to Tuesday...)


1. Cats in their window seat.
2. New plates
3. Dinner party set up
4. Pizza with fresh mozzarella
5. Chako finished all the jam!
6. A really cool snail shell I found with Willa, the lovely gal I am babysitting
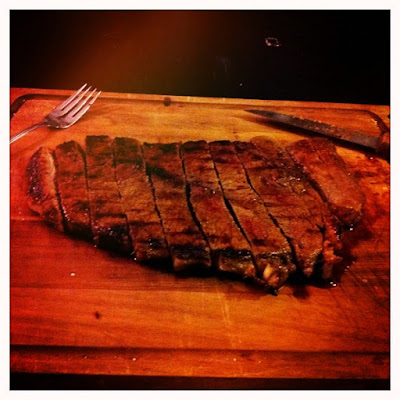
7. London Broil...happy dinner
8. A special bookmark made  by my dear friend Maggie that has lived in my kitchen for 4 years.
9. Ricotta bruschetta with honey and black pepper, apricot jam, and truffle oil and raspberry balsamic


Saturday, September 24, 2011

Fig Jam


I'm doomed. I was doing so well eating healthy and working out and being better etc etc. Blah blah. Now I might be pulled out of poverty with a new job, so to celebrate I bought four kinds of cheese, bread and sopressata. From Costco. Where they don't give bags. So when I ran into Chako on the street on the way into our apartment, my purse was literally bursting at the seems full of GIANT WHEELS OF FRESH CHEESE. It was kind of embarrassing. I was going to put it all in the fridge, cut them smaller put small pieces towards the front and hide the giant chunks behind herbs and tubs of batter and dough that he never goes near. Now he (and all of you) know that I am weak. I am weak for cheese and will buy it in bulk and eat it every chance I get. It's very very bad. 

As Chako is standing on the street hysterical laughing at the contents of my purse and my bright red face, I worked to justify my behaviour. I had just made a jam. It was a miracle. Jam as yummy as this fresh fig jam deserved cheese (and lots of it!), he had a long day and deserved jam and cheese, he's had a long several weeks dealing with me while on the job hunt and deserved jam and cheese. On and on and on. I'm sure he really enjoyed the scene.

Thankfully, to complement my cheese insanity AND continuing my fig party and crossing off Jams from Fall To Do List, I made...FIG JAM! This jam is so pretty! Little fig seeds, chunks of figs, a beautiful golden jelly, all piled into a freshly sterilized welches jar. All about recycling in this tiny kitchen...or hoarding. Whatever. We broke this our for the first time at a dinner with our dear friends Teff & Ryan. Slather this jam on fresh bread with creamy brie...killer. 

For the record, I didn't do all the fancy canning jamming things for this batch, this was a trial to see how the recipe would turn out, therefor the ingredient measurements are only for one small jar. Next time I'll do a big batch with proper canning technique and everything because guess what, everyone is getting jam for Christmas, birthdays, anniversaries you name it! So expect a follow up jamming post...

More beautiful figs

 Figs and sugar

 Lemon rind

Yummy sweet stuff in a pot

Needs some booze

First stage of cooking

Stage two of cooking

 Stage three of cooking

 Happiness in a jar.

Going on a jam making party. Raspberry jam, apricot jam, tomato jam...I'm going to make them all. And probably eat them with cheese. Come help us eat the crazy cheese in our fridge....

Fig Jam
Makes one jar

You'll Need...
About 10 figs, cut into small pieces (Smaller then the ones I cut, thats one thing I'll do better next time!)
1/4 cup of sugar  (You can add an extra tablespoon...I did)
1/8 cup of water
Juice from half a lemon
Rind from half a lemon
1 Tbsp of Cointreau

Put everything in a pot! Cook it over a high heat until its bubbling, stirring constantly so it doesn't burn. Once it bubbles for a few minutes (two or three), reduce the heat to medium, cover and let simmer for half an hour. Stir for a few more minutes on a medium heat, then remove the pot from the heat and let cool to room temperature. Transfer the jam into a clean, sterilized jar and refrigerate for four hours before using. 

Love.


Thursday, September 22, 2011

Pizza with Carmelized Shallots, Figs, Bacon & Blue Cheese


So this post is a little quick and dirty. Chako and I were a little too hungry last night to stop and take good photos of even really plate this pizza before devouring it. Literally we ate it straight off the pan, ripping it apart and stuffing our faces. I almost didn't even post it for lack of presentation, but it was so freaking good I just had to share. I borrowed a recipe from Shutterbean for the pizza dough, you can check it out here. The toppings were what I had in the kitchen including some beeeeaaa-yooooooo-tiful figs I picked up at a little produce place on the Upper East Side.

Happy Figs!

Shallot

Shutterbean's No-Knead Dough

Carmelize some those shallots with a bay leaf or two and thyme

Slather the dough

Slather some more!

Bake & Enjoy! Eat right from the pan...

Blue cheese is my bestest friend.

Pizza with Carmelized Shallots, Figs, Bacon & Blue Cheese

You'll Need....
Pizza Dough (store bought or make your own! I used this recipe from Shutterbean)
2 large shallots, thinly sliced
2 tbsp of olive oil
2 bay leaves
1 tsp thyme
4 slices of thick cut bacon, cut into small pieces
Handful of fresh figs sliced, use as many as you'd like I used 6
About 1/4 cup of crumbled blue cheese

Heat the oil in a saucepan. Add the shallots, bay leaves and thyme. Cook for about 15 minutes or until soft and slightly browned and smelling amazing. Remove the bay leaves and transfer the shallots to a small bowl. Add the bacon to the saucepan and cook until nice and crispy, transfer to a small bowl. Spread out the pizza dough onto an oiled baking sheet. Spread the shallots onto the dough, top with the bacon, figs and cheese. Bake at 500 degrees for 10 minutes or until the crust is lightly browned (LIGHTLY! trust me...). Eat it all!

Wednesday, September 21, 2011

French Bread

 There are certain things that I never even fathomed making. There's a way that buying a nice crisp load of French or Italian bread has become a part of my on the way home routine that is so innate to my schedule I can't imagine ever not doing it. I would never even stop to think how the amazing bread was made, even when I started making bread it never occurred to me that French bread was baked by someone, and not created magically by little French fairies in the sky with magic machines and wood burning ovens. This was what existed in my mind. Scary right?

But then... I BAKED IT MYSELF! Like a big girl, like a French fairy with a wood burning stove...but instead a Puerto Rican New Yorker with an tiny oven that only works at 250 or 450. A different version of the fantasy. You should try it, you won't believe how good you'll feel when it's done..and your apartment smells amazing...and it's super great.

Simple ingredients (no magic needed apparently)

Active yeast

Melt some butter, nice and slow.

Dry stuff.

Add some wet stuff.

Food processor! So easy!

Ball o' dough.

Make a roll. (Chako giggles...doof)

Put it to bed. 

A good nights sleep helps you grow.

Bake and release!

Yum. Serious yum.

An Honest Loaf of French Bread
Adapted from The Essential New York Times Cookbook, February 26, 1978: "French Bread Without Tears" by Craig Claiborne with Pierre Franey


You'll Need...
1 1/8 tsps active dry yeast
1/4 cup lukewarm water
1 cup cold water
2 tbsps unsalted butter
3 1/2 cups all-purpose flour
1 tsp salt

Blend the yeast with the lukewarm water in a small bowl. Stir to dissolve the yeast and let stand until foamy.

Slowly melt the butter in the cold water by heating slowly in a saucepan.

Add flour and salt to a food processor. Blend the flour and salt by pulsing three times. Add the yeast mixture and the dissolved butter mixture. Blend until the dough forms and becomes a ball and clears the sides of the processor, about 10-15 seconds.

Lightly flour a clear surface and turn the dough onto it. Knead the dough quickly and gently, try not to add to much extra flour. Shape into a ball.

Put the dough in a bowl that has been lightly buttered. Cover with a clean cloth and let stand for about 45 minutes until doubled in size. Turn out onto the floured surface and knead again, shape into a ball and return to the bowl for another hour until doubled in bulk again.

Turn the dough onto the floured surface seam side up and flatten with your fingers into a rough rectangular shape. Fold 1/3 of the dough towards the center of the rectangle and roll up like a jelly roll. Transfer the roll to a baking sheet with the seam on the bottom and the ends folded under. At this point, the roll should be about 13 1/2 inches long and 3 1/2 inches wide and 2 inches high. APPROXIMATELY! Don't go crazy. Cover with a clean cloth and return to a warm place. Let stand for 15-30 minutes until doubled in bulk.

As the dough rises, heat your oven to 450 degrees.

Using a super sharp knife (sharper then the one I used clearly...), make three parallel, diagonal gashes in the top of the dough. Immediately place the pain in the oven and add four ice cubes to the floor of the oven. Bake for five minutes then add four more ice cubes. Turn the pan so that the loaf bakes evenly. Bake for 10 minutes (now a total of 15!), then reduce the oven to 400 degrees. Bake for 15 to 20 minutes longer. Transfer the bread to a rack and let stand until cooled.

ENJOOOOOOY

Tuesday, September 20, 2011

Bits + Pieces: Roadtrip!


Chako and I flew into Michigan last Thursday night, and spent the long weekend driving in with his whole family in their incredible RV (that is nicer then our apartment!), to his grandparents lovely home in Sebree, Kentucky. We were there for a party to celebrate his grandparents 60th wedding anniversary and his grandmothers 80th birthday. It was an amazing trip! Here are some shots from our journey...


We had such an amazing time on this trip! It was great to spend time with his family, whom I adore, and meet his amazing grandparents. 

New recipes this week! Get excited!