You ever just have a day when you feel like you want to do things?
Today, I had this sudden urge to be good. Bake something, spend no money, clean a lot, cook a nice dinner for the kids and their parents, shower (don't judge), make a nice pot of coffee in the middle of the day.
So I did those things. Cleaned, cooked, coffeed, BAKED! Sometimes, when I don't have time to bake for awhile and then I do it without being rushed, I am shocked by how soothing it is. Heaven. More baking.
This bread was the answer to a sweet craving. I used a recipe that was originally from
Joy The Baker and was then re-blogged by
Brown Eyed Baker, two of my all time favorite food blogs. Consider it an homage to these two awesome ladies...they made me salivate to the point where I immediately had to make the recipe.
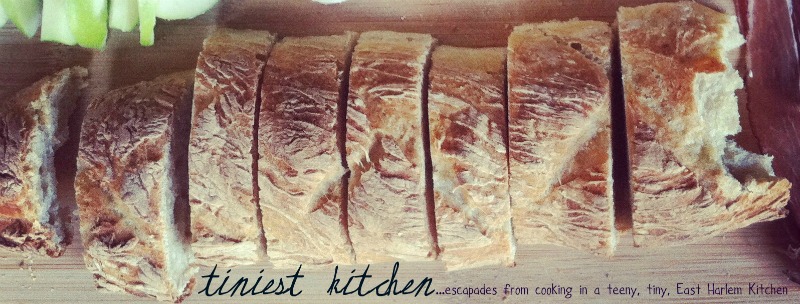
This bread is soft, moist, sugary, cinnamoney (good words!), and FUN! Yea, I said fun. Again, don't judge. It's food you pull apart with your hands and eat...covered in sugar. And brown butter. So there. It's fun.
Originally, the recipe is called
Cinnamon-Sugar PULL APART Bread, but Willa didn't like that, so she changed it to RIP APART Bread. I like it. Feels more active. RIP IT!
With Finn (aka Chimichanga) as my sous chef (mainly eating cheerios and drooling...), we were off!
Eat warm. With coffee. Share with kids. They will rip it to pieces. Active eating.
FUN!
Cinnamon-Sugar Rip Apart Bread
Adapted from Joy The Baker & The Brown Eyed Baker
You'll Need...
For Dough
2 3/4 cups of flour, plus 2 tbsp on the side
1/4 cup granulated sugar
2 1/4 tsp (1 packet) of active dry yeast
1/2 tsp salt
2 ounces salted butter
1/3 cup of milk
1/4 cup of water
2 eggs
1 tsp vanilla extract
For Filling
1/2 cup of granulated sugar
1/2 cup of light brown sugar
3 tbsp cinnamon
2 ounces browned butter
Make dough! Mix together 2 cups of your flour, sugar, salt and yeast. In a separate small bowl, whisk the eggs. In a saucepan, heat the butter and milk together until the butter melts. Add the water and vanilla then remove from heat and allow to cool for about 2-3 minutes.
Pour the milk mixture into the dry stuff, mix with a spatula. Add the eggs. The dough is kind of tricky, keep mixing until everything is combined, it will be pretty sticky and get stuck on the spatula. Keep going, it's all good.
Mix in the remaining 3/4 cup of flour (you should still have 2 tbsp for later!) Place the dough in a greased bowl, cover with plastic wrap and a clean kitchen towel and let rise for about an hour or until doubled in size.
While you have rising happening, make filling!
Mix together the sugars and cinnamon. Melt your butter in a small saucepan until it browns. Remove from heat. Easy!
Also, grease a loaf pan.
Once dough has risen, knead in the remaining 2 tbsp of flour and let sit covered by the towel for another 5 minutes. Roll out onto a floured surface. Roll the dough until its about 12x20-inches. Brush on your browned butter, then sprinkle on the sugar and cinnamon mixture. Use the entire mixture. I was afraid it was too much, it wasn't!
Cut the dough vertically into 6 long strips. Stack them on top of one another. Cut them into 6 stacks, so you'll have 6 stacks of 6 layers. Place them in the loaf pan (Brown Eyed Baker described it as "Like a flip book" this is a very helpful visual.)
Place the towel over the loaf and allow to rise another half hour. Pre heat your oven to 350 degrees.
Bake your loaf for 30-35 minutes, until it is a nice golden brown. Remove from the oven, let cool in the pan for about 15 minutes, run a knife around the edges and invert onto a serving plate.
That's a happy loaf!